生成對抗網絡 Generative Adversarial Network 二次元画像 GANimation + Appearance Flow

Talking Head Anime from a Single Image」 「Pramook Khungurn」 「表情模仿


The characters are virtual YouTubers (VTubers) affiliated with Nijisanji and are © Ichikara, Inc.
Nijisanji
月ノ美兎 月ノ美兎 本間ひまわり 本間ひまわり 葛葉 葛葉 御伽原江良 御伽原江良 笹木咲 笹木咲 鈴原るる 鈴原るる 叶 リゼ・ヘルエスタ リゼ・ヘルエスタ アンジュ・カトリーナ アンジュ・カトリーナ 椎名唯華 椎名唯華 鈴鹿詩子 鈴鹿詩子 緑仙 緑仙 アルス・アルマル アルス・アルマル 樋口楓 樋口楓 勇気ちひろ 勇気ちひろ 社築 社築 戌亥とこ 戌亥とこ 夢月ロア 夢月ロア 星川サラ 星川サラ 竜胆尊 竜胆尊 静凛 静凛 でびでび・でびる でびでび・でびる シスター・クレア シスター・クレア 加賀美ハヤト 加賀美ハヤト 鷹宮リオン 鷹宮リオン ベルモンド・バンデラス ベルモンド・バンデラス 郡道美玲 郡道美玲 健屋花那 健屋花那 黛灰 黛灰 夜見れな 夜見れな 舞元啓介 舞元啓介 花畑チャイカ 花畑チャイカ 剣持刀也 剣持刀也 ジョー・力一 ジョー・力一 ニュイ・ソシエール ニュイ・ソシエール ドーラ ドーラ エクス・アルビオ エクス・アルビオ 三枝明那 三枝明那 物述有栖 物述有栖 童田明治 童田明治 町田ちま 町田ちま 文野環 文野環 天宮こころ 天宮こころ 夢追翔 夢追翔 メリッサ・キンレンカ メリッサ・キンレンカ 葉加瀬冬雪 葉加瀬冬雪 ラトナ・プティ ラトナ・プティ フレン・E・ルスタリオ フレン・E・ルスタリオ イブラヒム イブラヒム 不破湊 不破湊 森中花咲 森中花咲 える える 魔界ノりりむ 魔界ノりりむ 桜凛月 桜凛月 ましろ ましろ 相羽ういは 相羽ういは 白雪巴 白雪巴 シェリン・バーガンディ シェリン・バーガンディ レヴィ・エリファ レヴィ・エリファ 夕陽リリ 夕陽リリ 神田笑一 神田笑一 えま★おうがすと えま★おうがすと 宇志海いちご 宇志海いちご 家長むぎ 家長むぎ 卯月コウ 卯月コウ 黒井しば 黒井しば 葉山舞鈴 葉山舞鈴 早瀬走 早瀬走 愛園愛美 愛園愛美 西園チグサ 西園チグサ 赤羽葉子 赤羽葉子 フミ フミ エリー・コニファー エリー・コニファー 雨森小夜 雨森小夜 グウェル・オス・ガール グウェル・オス・ガール 長尾景 長尾景 魔使マオ 魔使マオ ルイス・キャミー ルイス・キャミー 鈴木勝 鈴木勝 甲斐田晴 甲斐田晴 モイラ モイラ 渋谷ハジメ 渋谷ハジメ 奈羅花 奈羅花 雪城眞尋 雪城眞尋 小野町春香 小野町春香 伏見ガク 伏見ガク 鈴谷アキ 鈴谷アキ 空星きらめ 空星きらめ 北小路ヒスイ 北小路ヒスイ 山神カルタ 山神カルタ 瀬戸美夜子 瀬戸美夜子 弦月藤士郎 弦月藤士郎 飛鳥ひな 飛鳥ひな 安土桃 安土桃 来栖夏芽 来栖夏芽 轟京子 轟京子 周央サンゴ 周央サンゴ ギルザレンIII世 ギルザレンIII世 矢車りね 矢車りね 東堂コハク 東堂コハク 朝日南アカネ 朝日南アカネ 語部紡 語部紡 春崎エアル 春崎エアル 成瀬鳴 成瀬鳴

Abstract.

文章來源: Talking Head Anime from a Single Image

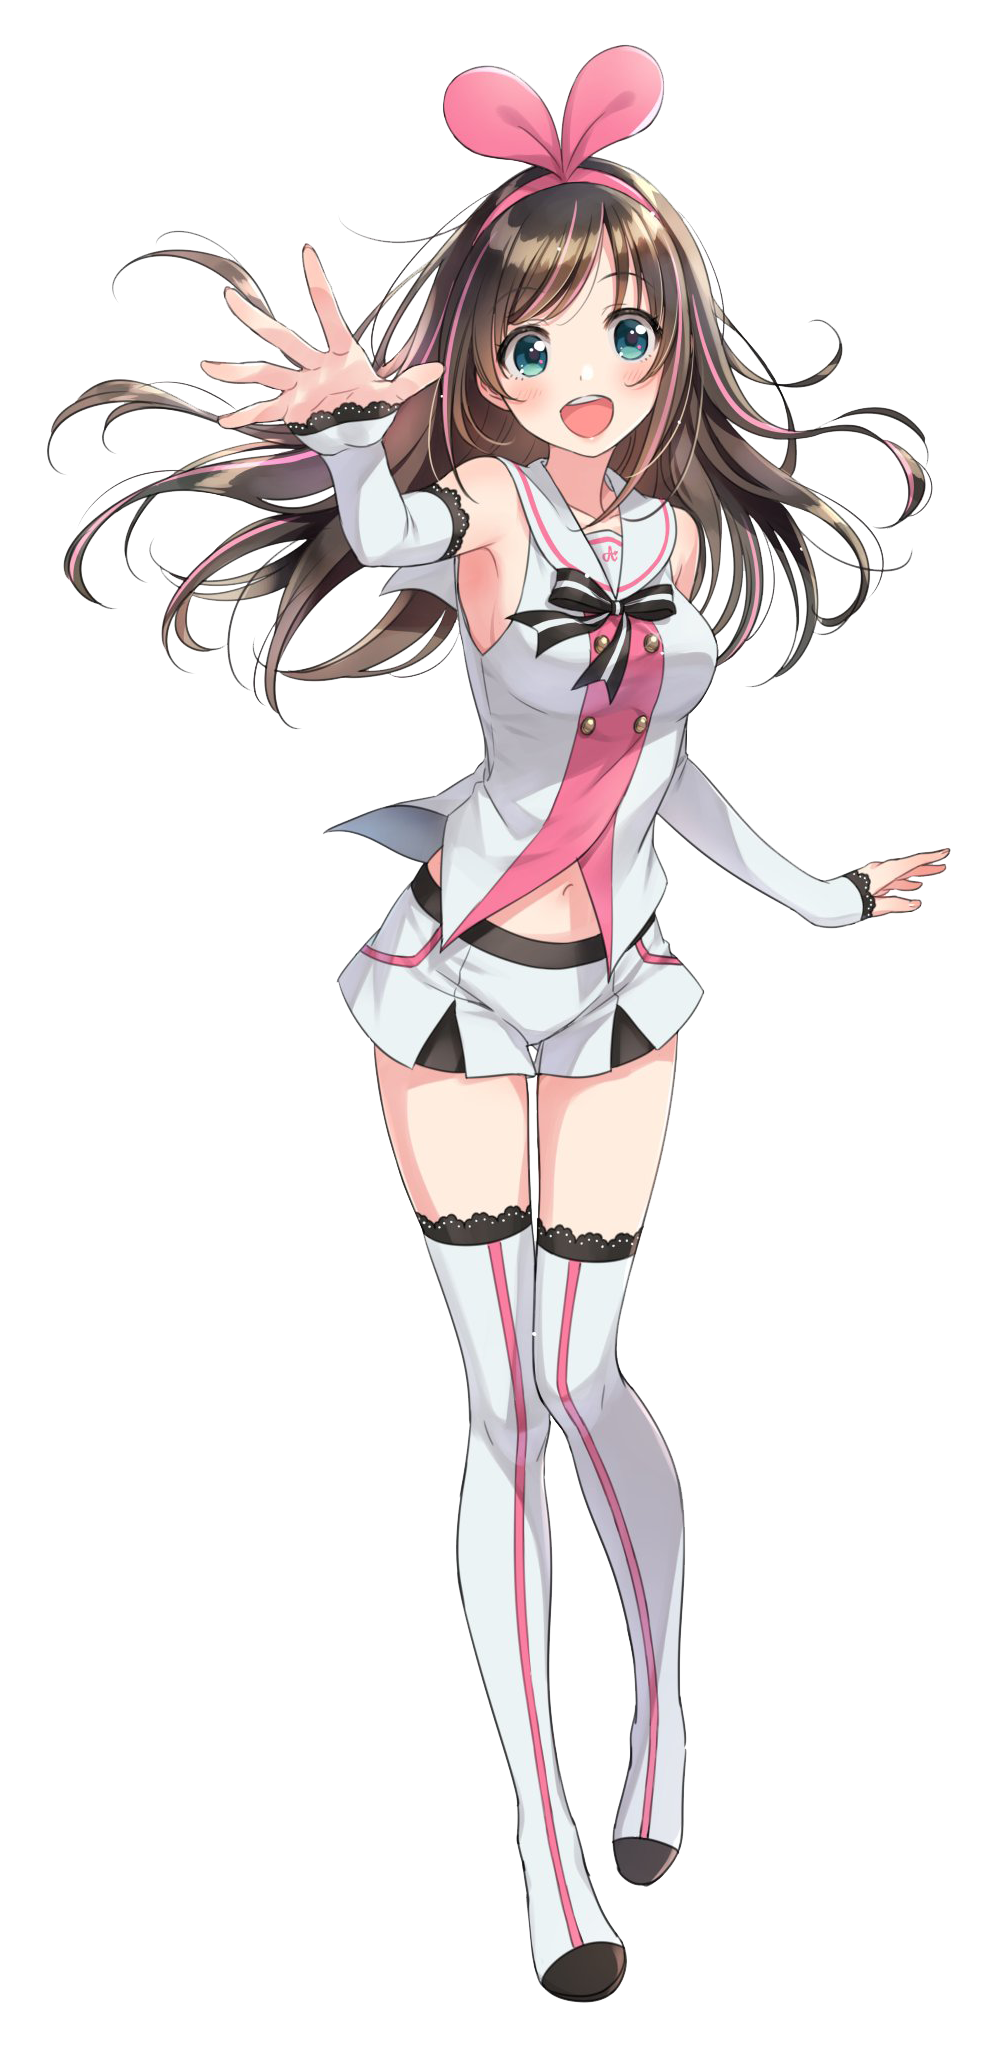
Fascinated by virtual YouTubers, I put together a deep neural network system that makes becoming one much easier. More specifically, the network takes as input an image of an anime character's face and a desired pose, and it outputs another image of the same character in the given pose. What it can do is shown in the video below:

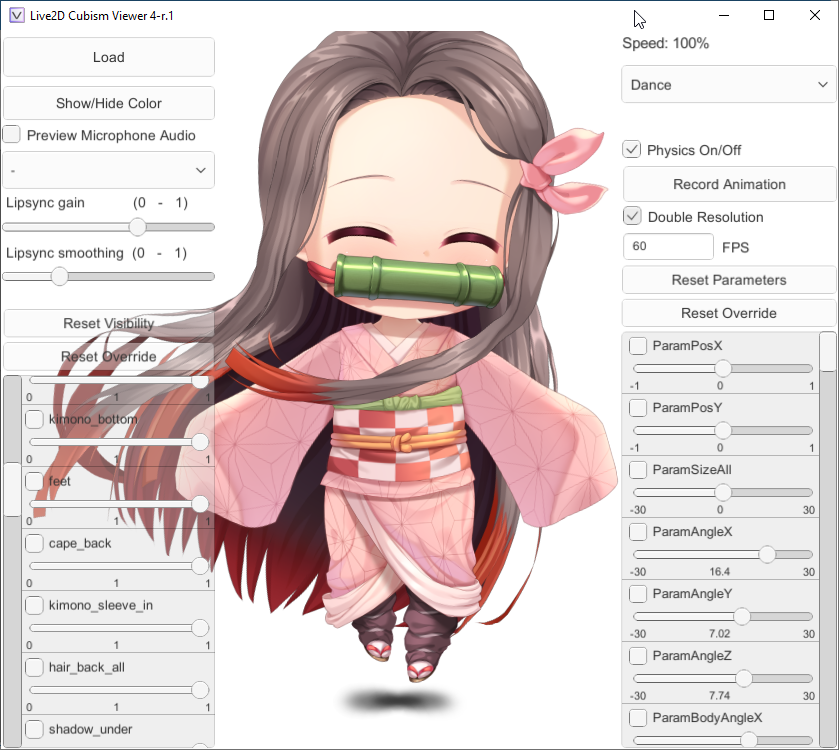
I also connected the system to a face tracker. This allows the character to mimic my face movements: I can also transfer face movements from existing videos:


You can find the code for the above tools here .

Introduction

On the other hand, I have also been fascinated by recent advances in deep learning, especially when it comes to anime-related stuffs. In 2017, a team of dedicated researchers have successfully trained a generative adversarial network (GAN) to generate images of anime characters of very good quality [1708.05509].

Recently, Gwern, a freelance writer,

  1. released the largest corpus of anime images
  2. and also managed to train another GAN that generated anime characters that are eye-poppingly beautiful.

Sizigi Studios, a San Francisco game developer, opened WaifuLabs, a website that allows you to customize a GAN-generated female character and buy merchandise featuring her.

Everything seems to point to the future where artificial intelligence is an important tool for anime creation, and I want to take part in realizing it. In particular, how can I make creating anime easier with deep learning? It seems that the lowest hanging fruit is creating VTuber contents. So, since early 2019, I embarked on the quest to answer the following question:

「Can I use deep learning to make becoming a VTuber easier?」

What am I trying to do?

So how do you become a VTuber to begin with? You need a character model whose movement can be controlled.

You need a character model whose movement can be controlled.

  1. One approach is to create a full 3D model of the character, and it is taken by many famous VTubers such as Kizuna AI. However, crafting a beautiful 3D model is expensive because it requires multiple types of talents: a great character designer is a must, and a highly skilled 3D modeler is also needed. It is rare for a person to be both, not to mention that creating a character is off limit for someone with no art skills like me. Asking price for a commission is around 500,000 yen (≈ 5,000 dollars) (≈ 150,000 台幣).

  1. Instead of 3D models, you can create 2D ones. A 2D model is a collection of movable images arranged into layers. Most VTubers use this type of models because it is much cheaper to create: commissioning seems to cost around 30,000 yen (≈ 300 dollars) (≈ 9,000 台幣). The body needs to be divided into multiple movable parts. The modeler then has to assemble them together using specialized software such as Live2D. Specifying the parts' movements is also time consuming.


文章來源: 電獺少女 『 Crypko 』二次元動漫人物產生器,讓 AI 幫你把小畫家圖變精緻!
日本一間軟體公司 Crypko,推出「Crypko」軟體,利用 AI 智能運算,輕鬆畫出超萌超可愛的二次元人物!之前 Crypko 團隊在 2017 推出簡易版的二次元人物生成器 MakeGirlsMo」,選擇人物髮型、髮色、瞳色、風格等等,就能生成一個動漫的女生頭像。

經過團隊改良之後,在 2018 推出了「Crypko」Beta 版,讓網友可以自行在網站上測試這項智能繪畫技術,原訂在 2018 年可以推出「Crypko」正式版,但也因為一推出就造成滿大的迴響,讓團隊想要把這款軟體修正、改良到更完美再推出,所以當時就決定延期推出「Crypko」,測試版也在 2019 年 3 月移除,但在測試期間,「Crypko」總共生成了超過 6 萬頁的人物圖片,團隊也保證每一張臉譜都是不一樣的。
在日本的動漫展 Comic Market 97,Crypko 展示「Crypko」技術,人物的神情比 2018 年測試版的更生動,只要很粗略的畫出大概的輪廓,AI 智能就會自動生成出精緻的動漫人物圖!

「Can we automatically generate them on the fly instead of creating movable 2D models first?」 ─ Pramook Khungurn

Being able to do so would make it much easier to become a VTuber.

  1. I can just go ahead and commission a drawing, which probably takes no more than 20,000 yen (≈ 6,000 台幣).
  2. Better yet, I can use a GAN to generate a character at virtually no cost (≈ 0 台幣)!

This would be a boon to not only someone who cannot draw like me, but also a benefit to artists: they can draw and get the character to move immediately without modeling.

I'm trying to solve is this: given

  1. an image of an anime character's face and
  2. a "pose,"

generate another image of the same character such that its face is changed according to the pose.

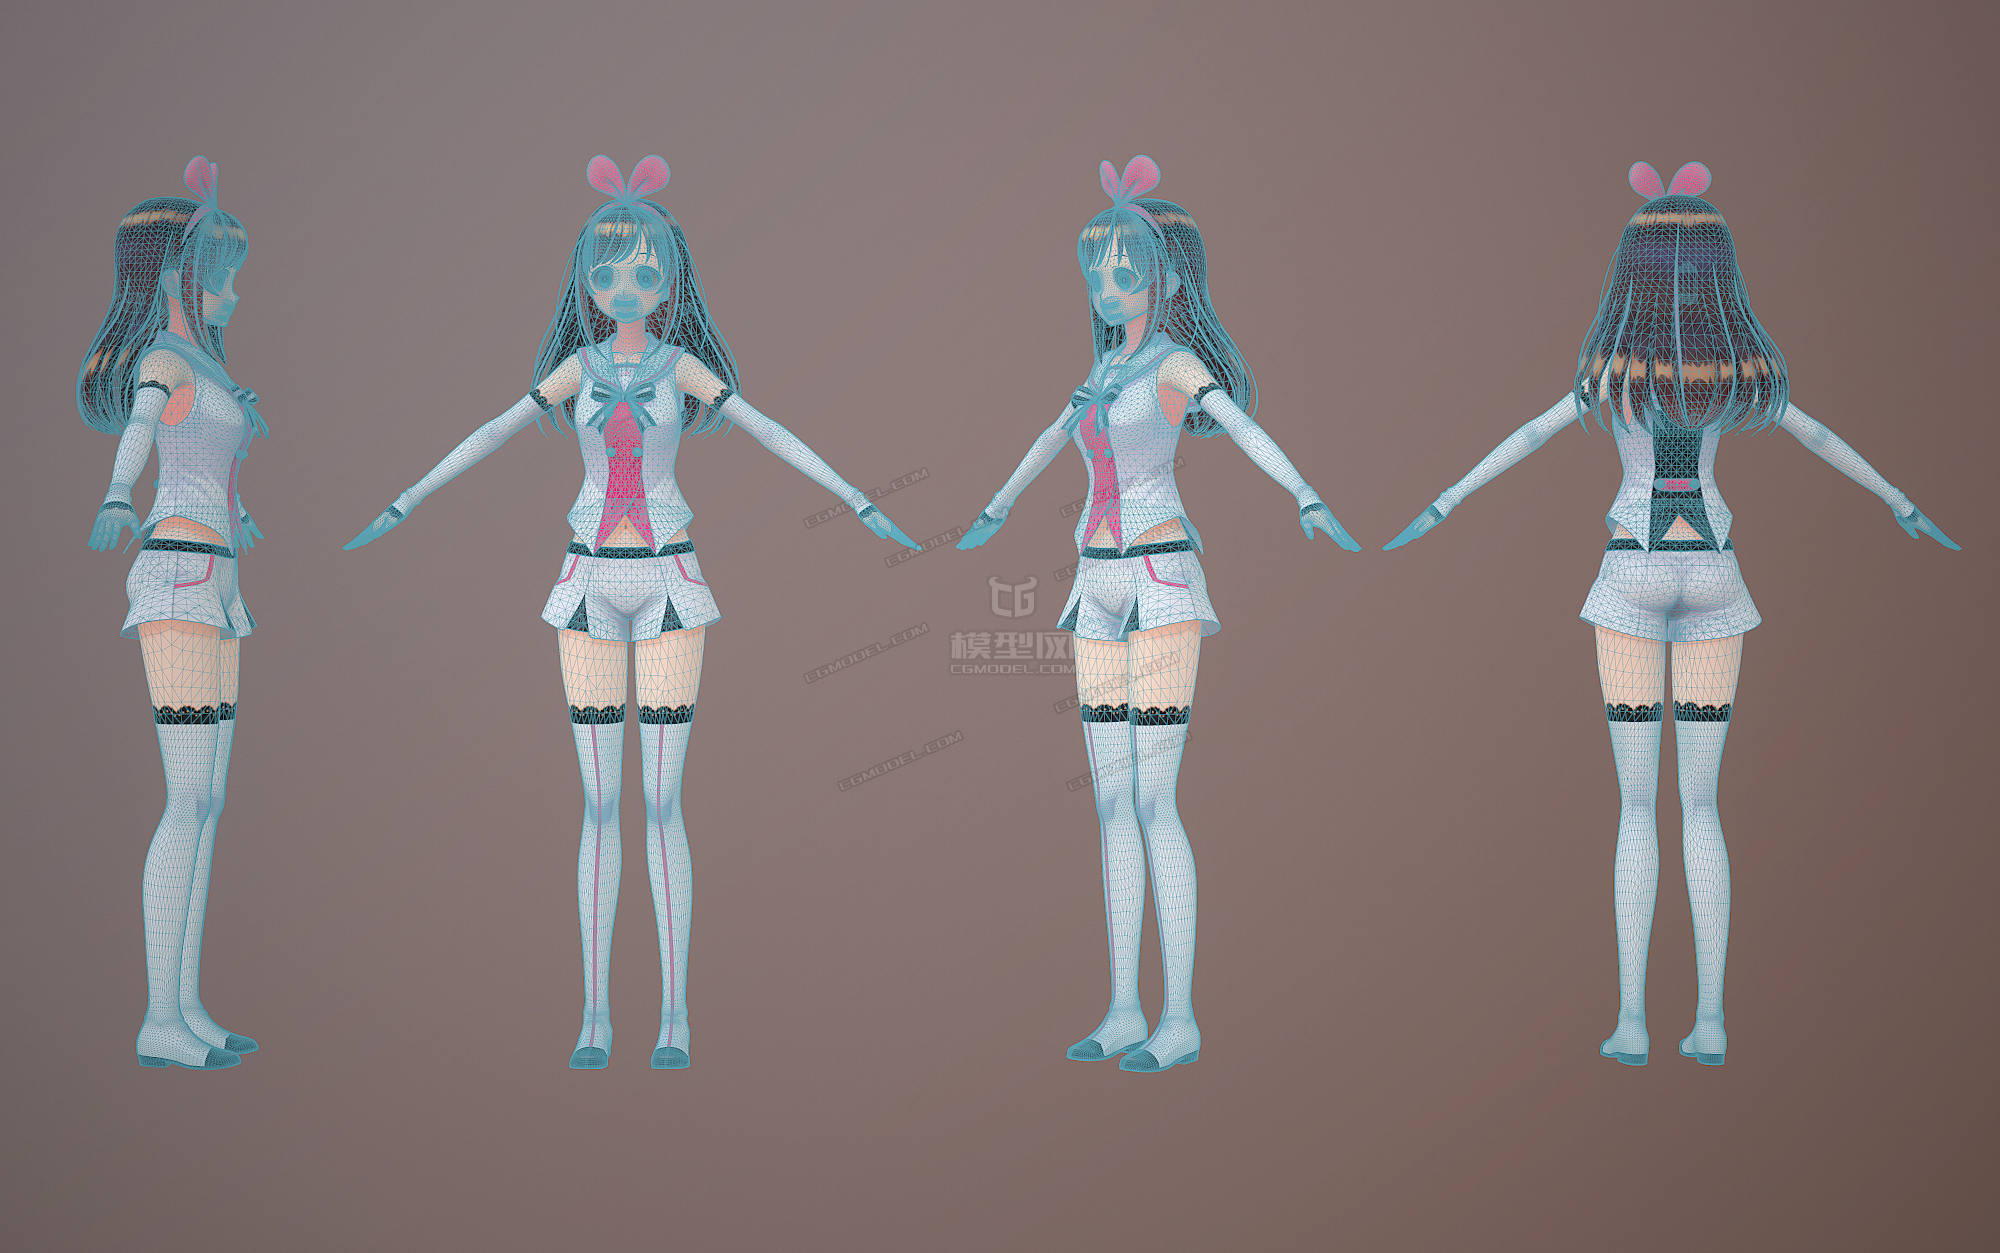
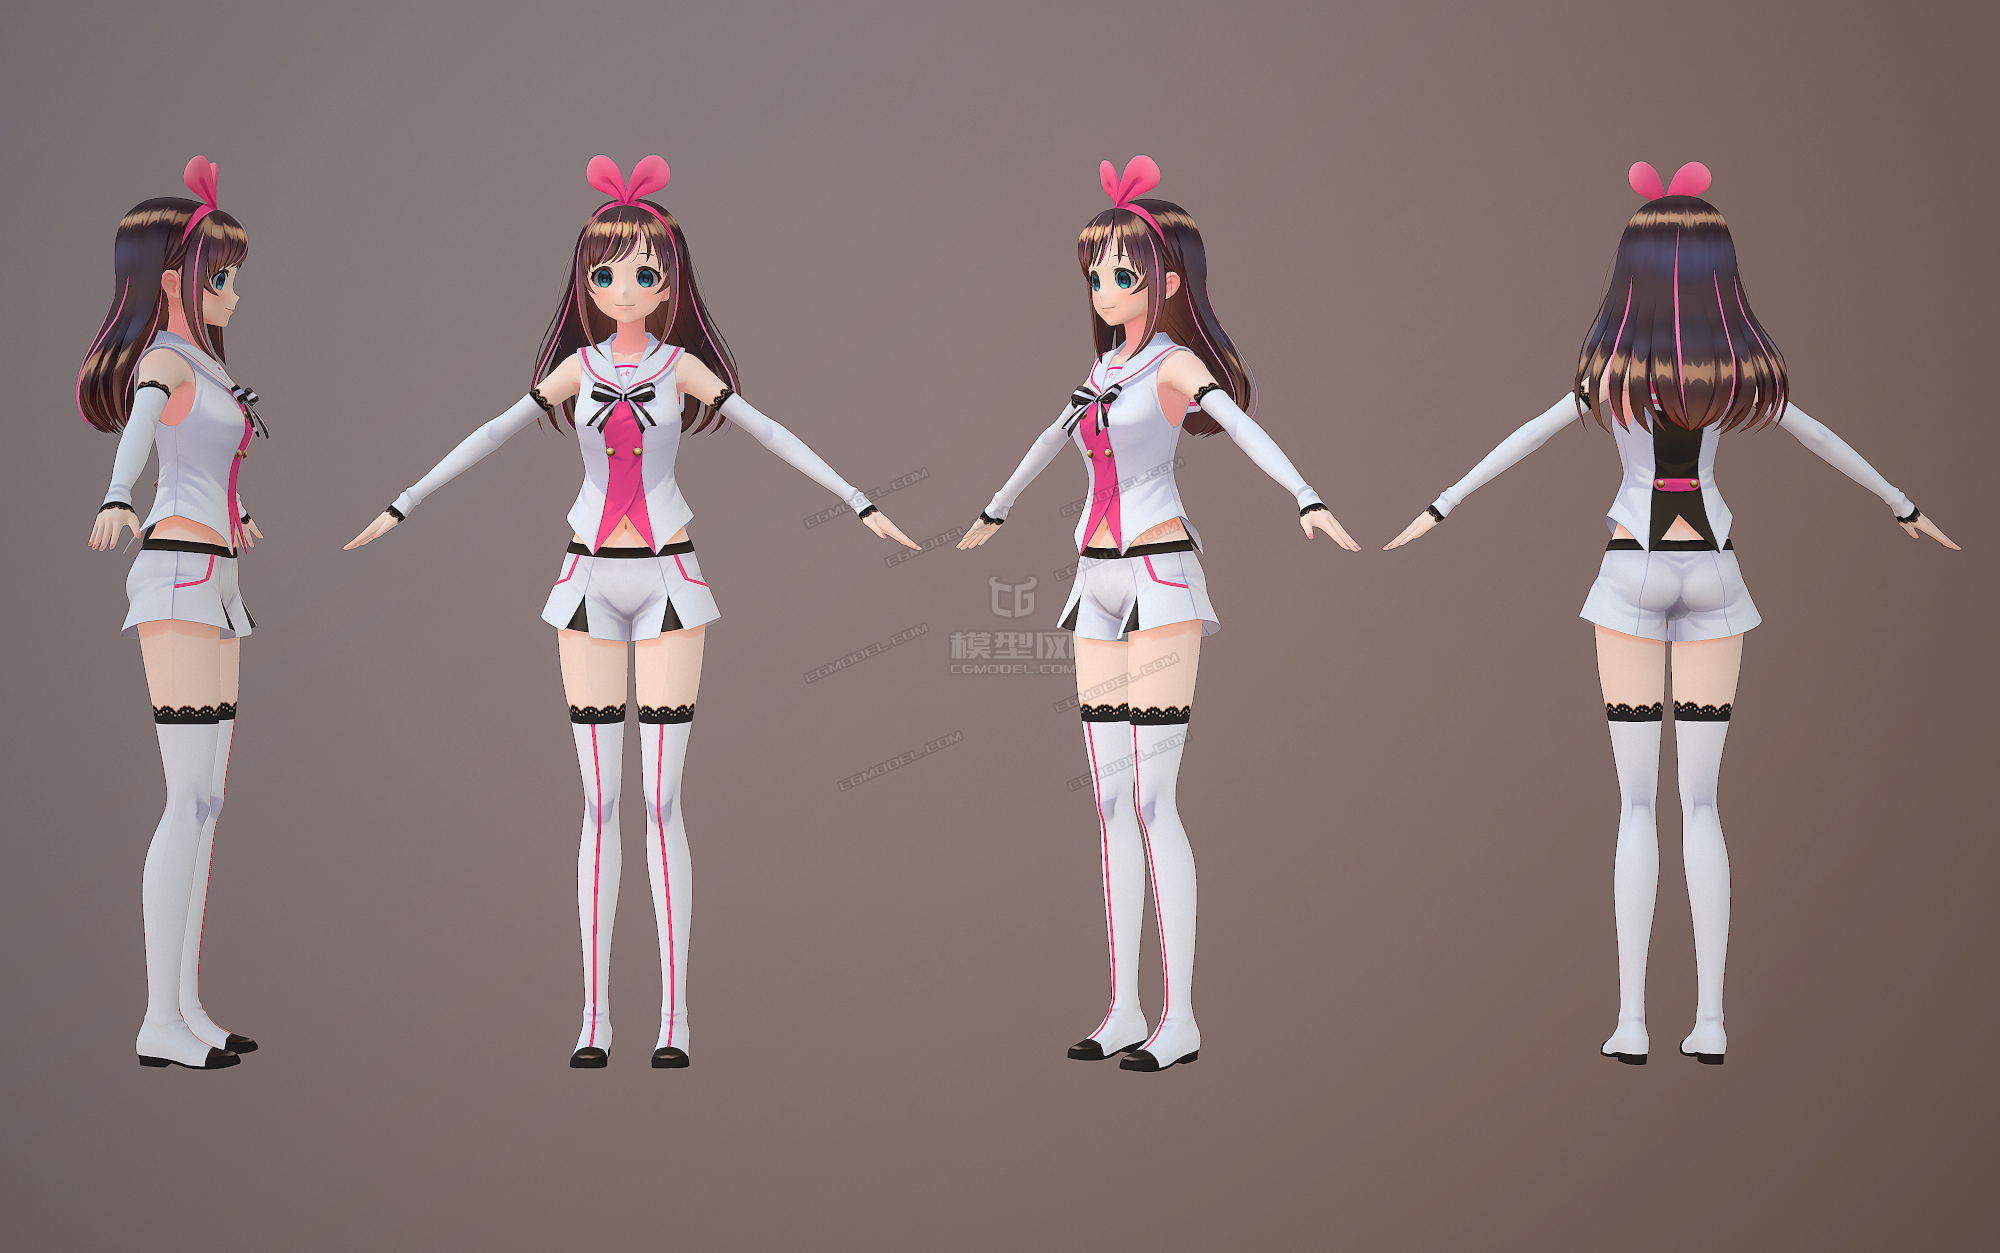
I took advantage of the fact that there are ten of thousands of downloadable 3D models of anime characters, created for a 3D animation software called MikuMikuDance. I downloaded about 8,000 models and used them to render anime faces under random poses.

I decompose the process into two steps.

  1. The first changes the facial expression; i.e., controlling how much the eyes and the mouth are opened.
  2. The second rotates the face. I use a separate network for each step, making the second network takes as input the output of the first.

Let us call the first network the face morpher, and the second the face rotator.

Face Morpher

I use the generator architecture employed by Pumarola et al. in their ECCV 2018 paper. The network changes facial expression by producing another image that represents changes to the original image. The change image is combined with the original using an alpha mask, also produced by the network itself. I found that their architecture works excellently for changing small parts of the image: closing eyes and mouths in my case.

Face Rotator

The face rotator is much more complicated. I use two algorithms, implemented in a single network, to rotate the face, thereby producing two outputs. The algorithms are:
  1. Pumarola et al.'s algorithm. This is the one just used to modify facial expression, but now I tell the network to rotate the face.
  2. Zhou et al.'s view synthesis algorithm. Their goal is to rotate a 3D object in an image. They do so by having a neural network compute an appearance flow: a map that tells, for each pixel in the output, which pixel in the input to copy color from.
  1. Pumarola et al.'s architecture produces blurry results but can hallucinate (幻覺的) disoccluded (被排除) parts as it is trained to change the original image's pixels without copying from existing ones.
  2. Appearance flow produces sharp results that preserve the original texture, but it is not good at hallucinating occluded parts that become visible after rotation.
Models  Results Hallucinate (幻覺的) Disoccluded (被排除) Pparts
Pumarola et al. blurry Yes
Zhou et al. (Appearance Flow) sharp No
To combine both approaches' advantages, I train another network to blend the two outputs together through an alpha mask. The network also outputs a "retouch" image, which is blended with the combined image with yet another alpha mask.

Problem Specification

The input to the system consists of:
  1. an image of an anime character and
  2. a desired pose vector.

The image is of size 256×256, has RGBA format, and must have a transparent background.

More specifically, pixels that do not belong to the character must have the RGBA value of (0,0,0,0), and those that do must have non-zero alpha values.

The character's head must be looking straight in the direction perpendicular to the image plane. The head must be contained in the center 128×128 box, and the eyes and the mouth must be wide open.

(The network can handle images with eyes and mouth closed as well. However, in such a case, it cannot open them because there's not enough information on what the opened eyes and mouth look like.)

In 3D character animation terms, the input is the rest pose shape to be deformed.


Figure 4A. Input image specification.

A 6-dimensional vector.

The character's face configuration is controlled by a "pose." Three components control the facial features and have values in the closed interval [0,1].
  1. Two components control the opening of the eyes; one for the left eye and the other for the right. The value of 0 means the eye is fully open, and 1 means the eye is fully closed.
  2. One component controls the opening of the mouth. This time, however, 0 means the mouth is fully closed, and 1 means the mouth is fully open. The contradicting semantics of the eye and the mouth parameters stem from the semantics of morph weights of the 3D models.

The three other components control how the head is rotated.

In 3D animation terms, the head is controlled by two "joints," connected by a "bone."

  1. The neck root joint is at where the neck is connected to the body.
  2. The neck tip joint is at where the neck is connected to the head.

In the skeleton of the character, the tip is a child of the root. So, a 3D transformation applied to the root would also affect the tip, but not the other way around.


Figure 4B. Two joints that control the character's head.
The three components of the pose vector have values in the interval [−1,1].
  1. One component controls the rotation around the z-axis of the neck root joint. Here, I use a coordinate system where the y-axis points up, the x-axis points to the left side of the character, and the z-axis points to the front. (See Figure 4B.) So, the component controls how much the neck is tilted sideway. I limit the rotation angle to the range [−15∘,15∘]. The value of −1 corresponds to −15∘, and the value of 1 corresponds to 15∘.
  2. One component controls the rotation around the x-axis of the neck tip join. Physically, it indicates how much the head is tilted up or down. Again, we map the component value's range of [−1,1] to the rotation angle's range of [−15∘,15∘]. A positive value means the head is tilted up, a negative value means it is tiled down, and the value of 0 means the head is facing in the direction parallel to the z-axis.
  3. The last component has the same angular range as the previous one, but it controls the rotation around the y-axis of the neck tip join. In other words, it control the horizontal direction of the face.
To recap, the input consists of an image of a character's face and a 6-dimensional pose vector. The output is another image of the face that is posed accordingly.

Dataset

I created a training dataset by rendering 3D character models. While 3D renderings are not the same as drawings, they are much easier to work with because 3D models are controllable. I can come up with any pose, apply it to a model, and render an image showing exactly that pose. Moreover, a 3D model can be used to generate hundreds of training images, so I only need to collect several thousand models.

I use models created for a 3D animation software called MikuMikuDance (MMD). The main reason is that there are tens of thousands of downloadable models of anime characters. I am also quite familiar with the file format because I used MMD models to generate training data for one of my previous research papers. Over the years, I have developed a library to manipulate and render the models, and it has allowed me to automate much of the data generation process.

To create a training dataset, I downloaded around 13,000 MMD models from websites such as

  1. Niconi Solid and
  2. BowlRoll.

I also found models by following links from

  1. VPVP wiki,
  2. みさきる!, and
  3. Nico Nico Pedia.

Downloading alone took about two months.

Data Annotation

The raw model data are not enough to generate training data. In particular, there are two problems.

The first problem is that I did not know exactly where each model's head was. I need to know this because the input specification requires that the head be contained in the middle 128 ×128 box of the input image. So, I created a tool that allowed me to annotate each model with the y-position of the bottom and the top of the head. The bottom corresponds to the tip of the chin, but the top does not have a precise definition. I mostly set the top so that the whole skull and the flat portion of hair that covers it are included in the range, arbitrarily excluding hair that pointed upward. If the character wears a hat, I simply guessed the location of the head's top. Fortunately, the positions do not have to be precise for a neural network to work. You can see the tool in action in the video below:

The second problem is that I did not know how to exactly control each model's eyes. Facial expressions of MMD models are implemented with "morphs" (aka blend shapes). A morph typically corresponds a facial feature being deformed in a particular way. For example, for most models, there is a morph corresponding to closing both eyes and another corresponding to opening the mouth as if to say "ah."

To generate the training data, I need to know the names of three morphs:

  1. one that closes the left eye,
  2. one that closes the right, and
  3. one that opens the mouth.

The last one is named "あ" in almost all models, so I did not have a problem with it.

The situation is more difficult with the eye-closing morphs. Different modelers name them differently, and one or both of them might be missing from some models.

I created a tool that allowed me to cycle through the eye controlling morphs and mark ones that have the right semantics. You can see a session of me using the tool in the following video.

You can see in the video that I collected 6 morphs instead of 2.

The reason is that MMD models generally come with two types of winks. Normal winks have eyelids curved downward, and smile winks have eyelids curved upward, resulting in a happy look.

Moreover, for each type of wink, there can be three different morphs: one that closes the right eye, one that closes the left, and one that closes both.

At the point of data annotation, I was not sure which type of wink and morph to use, so I decided to collect them all. In the end, I decided to use only the normal winks (眨眼) because more models have them. While it seems that morphs that close both eyes are superfluous, some models do not have any morphs that close only one eye.

Annotating the models, including developing tools to do so, took about 4 months. It was the most time consuming part of the project.

Pose Sampling

Another important part of the training data is the pose, which I need to specify one for every training example. I generated poses by sampling each component of the pose vector independently. For the eye and mouth controlling parameters, I sample them uniformly from the [0,1] interval. For the head joint parameters, I sampled from a probability distribution whose density grows linearly from the center of the range (i.e., 0) to the extreme values (i.e., −1 and 1). The density is depicted in the figure below:

Figure 5A. Probability distribution for sampling the head joint parameters.
I chose this distribution to increase the frequency of hard training examples: when some head joint parameters are far from 0, there would be a large difference between the head configuration and that of the rest pose. I believe that forcing the network to solve challenging problems from the get-go would make it perform better in general.

Rendering

To generate a training image, I decide on a model and a pose. I rendered the posed model using an orthographic projection so that the y-positions of the top and bottom of the head (obtained through manual annotation in Section 5.1) corresponds to the middle 128-pixel vertical strip of the image. The reason for using the orthographic projection rather than the perspective projection is that drawings, especially of VTubers, do not seem to have foreshortening effects.

Rendering a 3D model requires specifying the light scattering properties of the model's surface. MMD generally uses toon shading, but I used a more standard Phong reflection model because I was too lazy to implement toon shading. Depending on the model data, the resulting training images might look more 3D-like than typical drawings. However, in the end, the system still worked well on drawings despite being trained on 3D-like images.

Saba
Viewer (MMD/OBJ) MMD (PMD/PMX/VMD) play and load library

Figure 5B. Comparison between (a) a rendering by the MikuMikuDance software, and (b) a rendering by my library. MMD produces a flat appearance that is more similar to a drawing. You can notice that the nose is much more noticeable in (b) than in (a). Nonetheless, because the images are very similar overall, the network trained with (b) would still generalize well to drawings. The character is Aduchi Momo (安土桃) and is © Ichikara Inc. The 3D model was created by 弐形 and is available here.

Rendering also requires specifying the lighting in the scene. I used two light sources.

  1. First is a directional white light of the magnitude 0.5 that points straight in the −z direction. The light's direction was chosen to minimize shadow in the rendering.
  2. Second is a white ambient light source of magnitude 0.5.

Another detail of the data generation process is that each training example consists of three images.

  1. The first is that of the character in the rest pose.
  2. The second only contains changes to facial features.
  3. The third adds face rotation to the second.

I do this because I have separate networks for manipulating facial features and rotating the face, and they need different training data. Note that, since the image with the rest pose does not depend on the sampled pose, we only need to render it once for each model.


Figure 5C. For each training example, I rendered three images: (a) one with the character in the rest pose, (b) one with only facial expression changes, and (c) one with both facial expression changes and face rotation.
Training the face morpher uses (a) and (b), but training the face rotator uses (b) and (c).

Datasets

I divided the models into three subsets so that I can use them to generate the training, validation, and test datasets.

While downloading the models, I organized them into folders according to the source materials. For example, models of Fate/Grand Order characters and those of Kantai Collection characters would go into different folders.

  1. I used models of VTubers from Nijisanji to generate the validation set and
  2. models of other VTubers to generate the test set.
  3. The training set was created from characters from anime, manga, and video games.

Because the origins for the characters are different, there are no overlaps between the three datasets.

The numerical breakdown of the three datasets are as follows:

  Training Set Validation Set Test Set
Models 7,881 79 72
Sampled Poses 500,000 10,000 10,000

  Training Set Validation Set Test Set
Rest Pose Images 7,881 79 72
Expression Changed Images 500,000 10,000 10,000
Fully Posed Images 500,000 10,000 10,000
Total Number of Images 1,007,881 20,079 20,072

Data generation was fully automated. The whole process took about 16 hours.

MMD 解壓縮時,為了避免亂碼,須使用 BANDIZIP 來解壓縮 MikuMikuDance_v932x64.zip,按滑鼠右鍵,選「預覽壓縮檔」,再點選右方「字編頁」,選擇「日文」。

64bit 版 Windows MMD 需要安裝 Visual C++ 2010 SP1 可轉散發套件 (x64) 並安裝 DirectX


CubismViewerGems
『Beyond Creation』 Live2D Original Short Animation